|
<< Click to Display Table of Contents >> Navigating the receipt editor's user interface |
  
|
|
<< Click to Display Table of Contents >> Navigating the receipt editor's user interface |
  
|
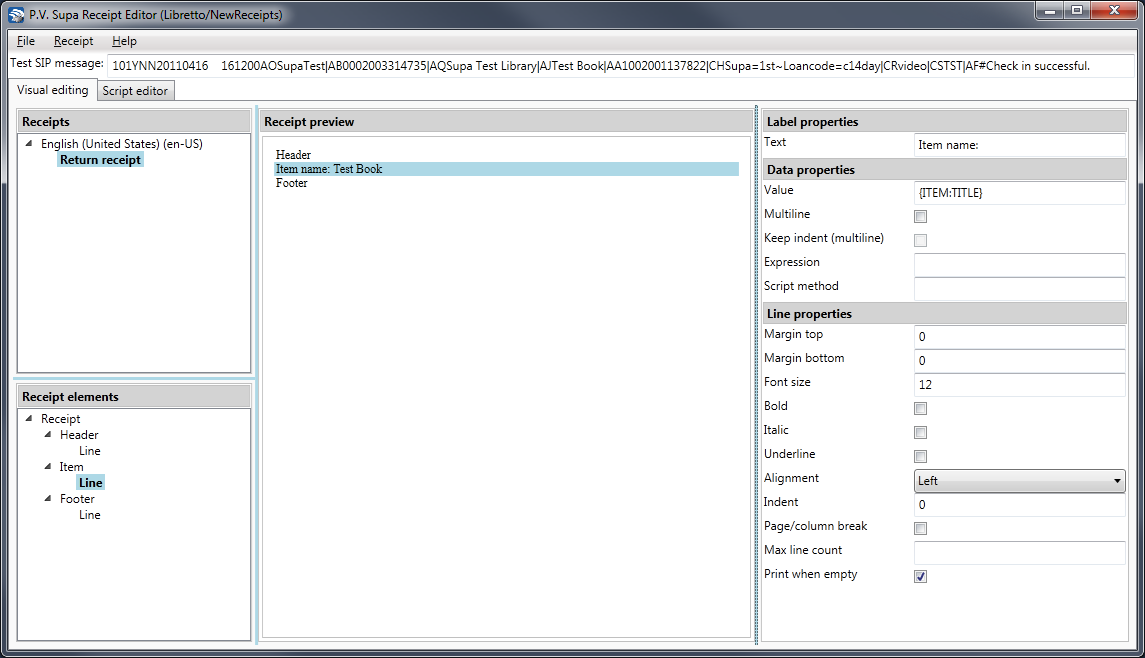
Receipt editor has two views – Visual editing for editing the content and layout of the receipt and Script Editor for writing custom functions to manipulate receipt lines’ data values.
Visual editing is divided in four sections:
Receipts (left top) contains a list of receipt definitions in the collection, grouped by languages.
Receipt elements (left bottom) contains a list of selected receipt’s sections (Header, Item and Footer) and the lines to show on the printed receipt for each section
Receipt preview (center) shows an approximated preview of the printed receipt to help visualize the effects of changes made in the receipt properties without actually printing the receipt after every change
Properties (right) shows the properties of currently selected (in the bottom left section) receipt element. The properties section is divided into sub-groups and will display different content based on what is selected from the receipt elements:
Receipt properties provide control over the whole receipt’s appearance
Section properties for the selected section (Header/Item/Footer) provide control over that section’s appearance
Line properties provide control for a single line’s appearance and content. This section is again divided into sup-groups:
Label properties section for setting the text in a receipt line
Data properties section for embedding SIP fields or special functions (current date/time etc.) in a receipt line
Line properties for controlling the appearance of the line, such as font size and alignment.

Receipt editor main window