|
<< Click to Display Table of Contents >> Configuring IP cameras |
  
|
|
<< Click to Display Table of Contents >> Configuring IP cameras |
  
|
Basic configuration to be carried out is to give a user name and password combination to each camera, and then configra the camera triggers and picture options, and finally set the FTP to correctly store the pictures on the self operated library controller.
This manual covers only a very basic set of setting to get the cameras operational within Supa self operated library system. For more advanced topics and adjustments, please refer to the Axis documentation.
First thing needed is to find the IP address of the speakers. This can be achieved using the Axis IPUtility tool:

It is also possible to set the IP address of your computer to match the address space of the default IP settings of a camera, and connect it directly to the computer. By default, the Axis cameras typically have an address 192.168.0.90 . Using the AXIS IP Utility is simpler as the cameras can be connected to an internal network directly, they will then get the IP address from a DHCP server and be easily available through a browser interface.
In IP Utility, the cameras are identified by serial number. You will find the same serial number on the back of the camera, as well as on the box the camera comes in. You can immediately access the camera once you identify it, by right-clicking on it and selecting View Home Page:

View home page from Axis IP utility
This will take you to the browser interface.
Important note: The browser interface officially only works in Internet Explorer; it might work in other browsers at least partially, but IE is the officially supported one. You will also need to install Axis Media Control embedded software, which is basically an ActiveX control for IE.
The first time you visit the home page, the camera requires you to set a password:

Initial password change for the camera
If you received the cameras from P.V. Supa, this step may already have been done, in which case you should have information as to what the password is.
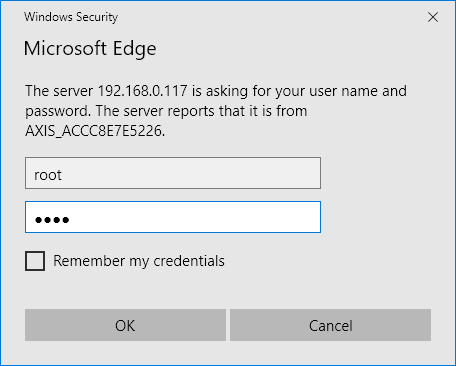
After setting the password, you are presented with a login prompt on the browser:

Camera login prompt
The default user is always root and the password here is what you just set it to. After clicking OK, you will be asked some basic questions like electricity frequence (the cameras have built-in flicker reduction system which is dependent on the correct frequency being set). After answering all these, you should see a live view feed from the camera on your browser:

Most configuration after this initial setting of IP address is done via the browser interface. The browser address is the IP address of the camera; note, that you need to set the IP address to a fixed address for the camera streaming to work reliably.