|
<< Click to Display Table of Contents >> Create a schedule |
  
|
|
<< Click to Display Table of Contents >> Create a schedule |
  
|
A schedule is a set of periods over a week. There can be many schedules created, but only one is active at any given time. This allows separate schedules to be created for holiday seasons, for example, and then just activated for that time.
To create a schedule, right-click on the Schedules entry in the schedule editor view and select New schedule:
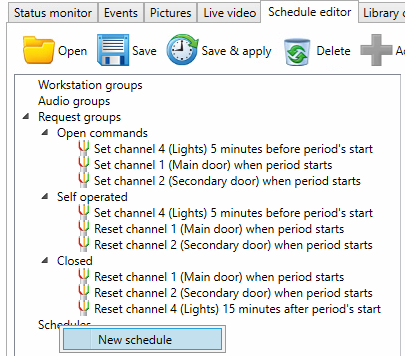
Creating a new schedule
You'll need to give the new schedule a name, and it is also advisable to give it a description in case there will be multiple schedules in the system.
Pay attention to marking the schedule active: once this is selected, this schedule will be made active and all requests including IO commands will begin to get sent.
When a schedule is created, you can add schedule periods to it by pressing the Add schedule period button (green plus sign) above the schedule. This brings up a dialog. Let's make the library be open from Monday morning 09:00 until 18:00 :
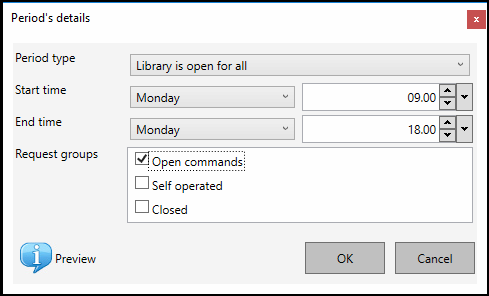
Library is open on Monday
It is important to select what Request groups are tied to this period. This system makes it possible to design different types of Open periods, or any other periods, if needed. For example a self operated period could be different on weekends, only turning on some lights, opening only some self service units and some door locks - and then on weekdays it could allow more extensive use of a library, by opening more things.
After accepting this period it will become visible in the calendar view. Let's create another one, let's make the library self operated for the Monday evening, say, until 22:00 :
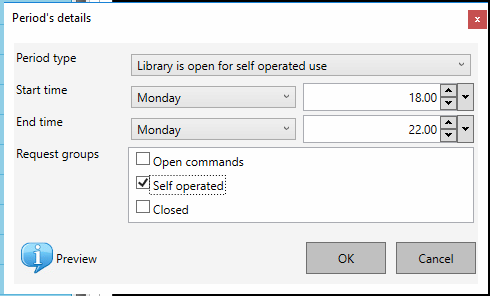
Self operated period for Monday evening
After that, the library should be closed until Tuesday morning, 10:00 :
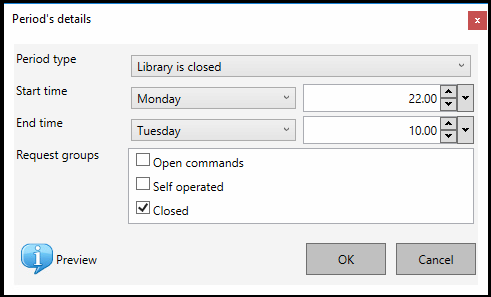
Closed from Monday evening to Tuesday morning
After these your schedule should contain three periods, one of each available type, and look like this:
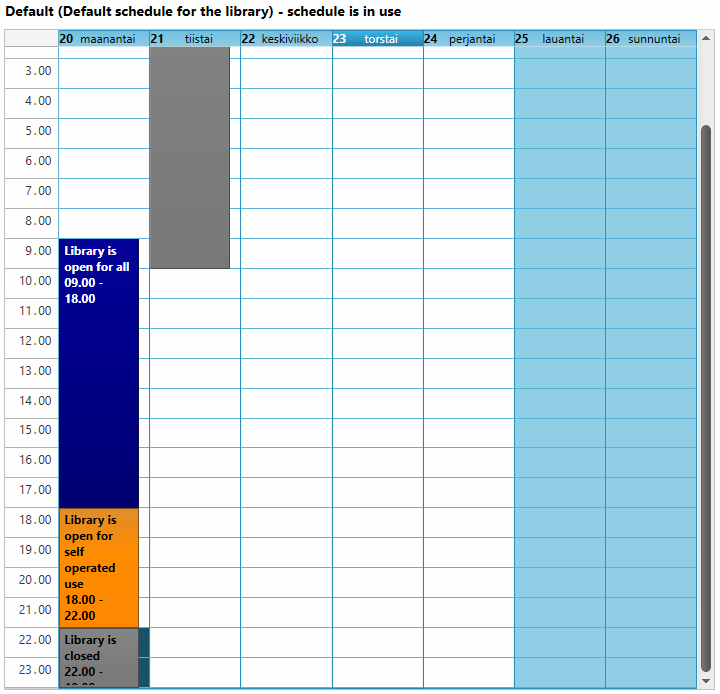
Default schedule - Monday done, Tuesday next
As you can see, periods can extend over midnight to two days, and in fact even further. You can make the library close from Friday evening to Monday morning using a single Closed period.
After creating the whole schedule as you wish, press the Save and apply button (clock icon) on top of the schedule view, to make an active schedule reload in all controllers. You should now be able to see in the IO module, the led indicators turn on and off based on the schedule.
The end result might look like this:
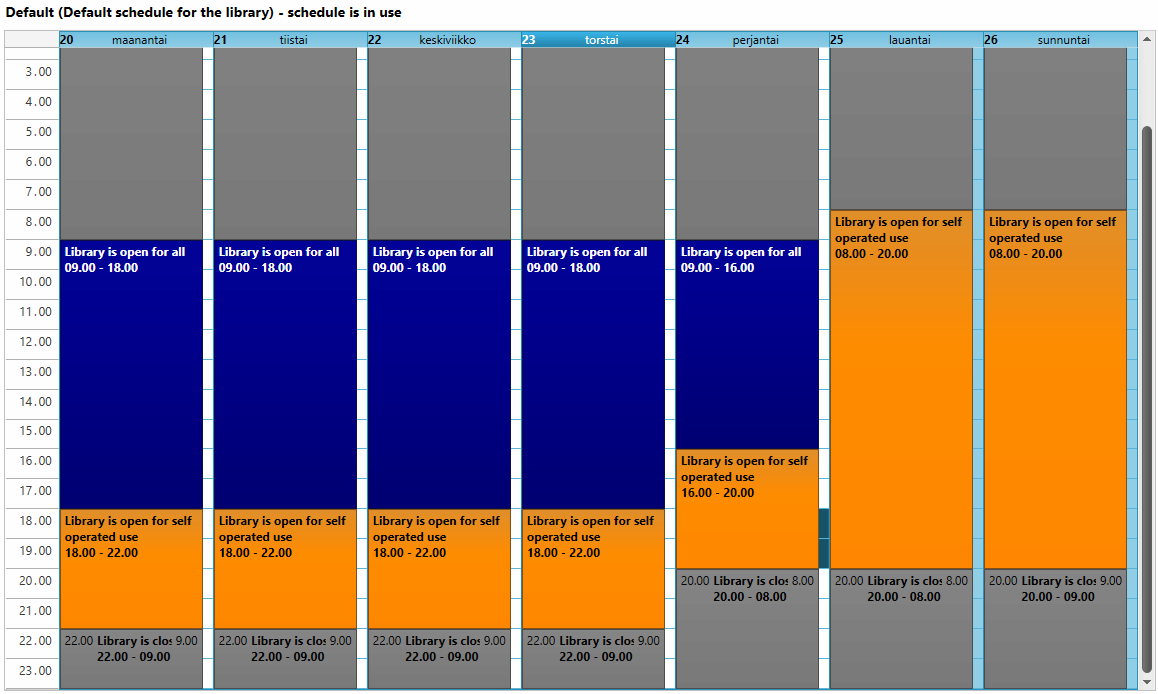
Full weekly schedule
There are shortcuts available in a context menu. Right-click on a period to copy it to next or previous days, for example. You can create one day and then copy the periods from that to the following days, to create a schedule very quickly. You can also paint an empty area from the schedule, right-click on it and select to create a period there, which will automatically use the selected day and timespan from the painted area.
Once a schedule has been created it is a good idea to check the commands that will be sent. Click on the Preview button above the schedule. This view lists all commands that will be sent, and on which day and time they will be sent. The color coding makes it easier to follow from which reason a command is sent:
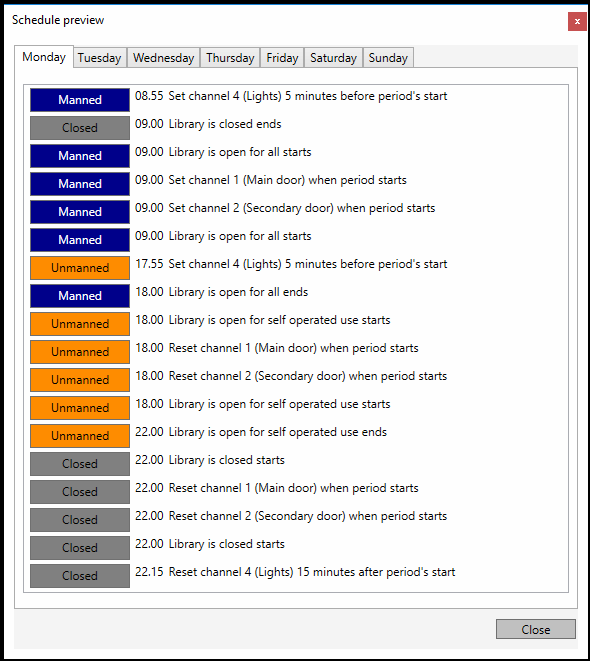
Schedule preview window
In the example above, you can see that at 09:00 the Closed period ends. Five minutes before that, a blue marker ("Manned") indicates a command that belongs to that period. That is the "Turn on lights five minutes before opening the library" request that we defined earlier. This view allows you to make sure that all commands are in their correct places.